Anchor Trolley System
Fitting an Anchor Trolley System to your kayak is arguably one of the most important items that you can install. Fitted correctly can mean a comfortable safe and relaxing days fishing, fitted badly it can be extremely dangerous.
Although the first time we fitted an anchor trolley to the Prowler 13 it worked well, we found the balance to be a little awkward, so with a few fine adjustments (3rd version) we are ready to share it.
The items we have used in our anchor trolley system are as follows:
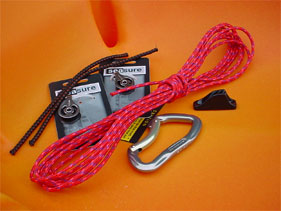
A selection of the items used.
6 metres, 4 mm low stretch rope.
2 x 20 cm, 5 mm elastic rope.
2 x Seasure 25 mm general purpose blocks - 00.05.
1 x Seasure 25 mm electropolished stainless steel ring - 07.14.
1 x Carabineer - DMM Truclip.
1 x Holt alanite control line cam cleat.
1 x Clamcleat - CL 213 Fineline (Starboard).
1 x Clamcleat - CL 214 Fineline (Port).
1 x 1.5 kg folding anchor.
1 metre, 6 mm galvanised chain.
1 x galvanised shackle.
1 x 10 cm cable tie.
50 metres cord, B&Q on hand reel.
Our anchor system is fitted to the right hand side of the kayak, this is a personal preference and the system can be fitted to either side or even both.
Firstly remove the standard rope fitted to the right hand side of the Prowler. Loop the first piece of 20 cm elastic rope through one of the Seasure blocks, then thread each end through either side of the plastic rope tidy which is closest to the bow, holding both ends equally tie together using a simple thumb knot.
Repeat the procedure with the second piece of elastic rope and roller block, this time fitting to the rope tidy at the rear of the tank well, to ease fitting it may be necessary to slacken the tank well elastic and use to help pull the new elastic through the hole, stretching both ropes will make them narrower again helping with this procedure, this is quite tricky as it is a very tight fit. Tie off again using a thumb knot.
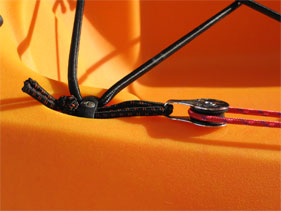
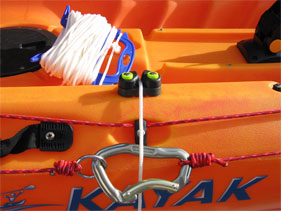
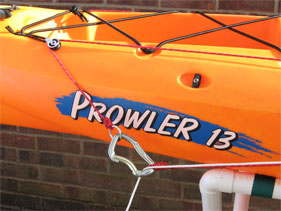
Tie the 25 mm stainless steel ring onto one end of the 6 metre length of rope, use a barrel knot to secure. Thread the rope up through the rear block. Please note that it is important that stainless steel ring is at the rear of the kayak. As you pass the kayak lifting handle thread the rope through the top of the rope tidy, do not thread the rope through any of the other rope tidies on route as this will make the system stiff to operate when under load.
Feed the rope downwards through the front block.
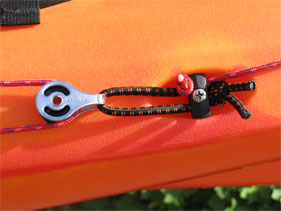
Clip the carabineer to the stainless steel ring so that it opens to the rear and faces down as in the next two pictures. Thread the loose end of the rope through the carabineer and pull tight so that the elastic stretches a little, fasten using a barrel knot. Don't leave any slack in the rope as it will stretch a little on your first couple of outings.

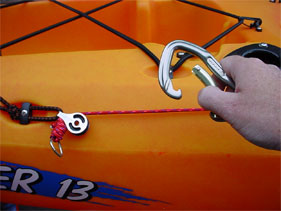
If you now unclip the carbineer you will see why it was important to install this way round. With the stainless steel ring jammed against the rear block and holding the carabineer, you are able to use the line to tow your kayak through the shallows, or to connect your kayak to another kayak or vessel.
Next item to be fitted is a control line cam cleat to lock the anchor line. Fixed with 2 x M4 40 mm flat headed bolts.
Position the cam cleat directly above the rope tidy we used earlier, forward of the lifting handle. Using a 4 mm drill bit, drill down through the block, holding it tightly in position, make sure that you have it around the right way so that the cams swing inwards toward the foot well, push in the first bolt and then drill the second hole again through the block, this will give a perfect fit. Remove the cleat and tidy up the holes with a sharp blade or glass paper, add a little Loctite 595 silicone sealant to each of the holes.
Place block and bolts into position once again. Fitting the nuts to these bolts is a two man job as access is via the front hatch, we had to use a short handle extension tube fitted to our ratchet (bit of pipe taped to the handle). Second set of hands will be needed to tighten the bolts with a screwdriver.
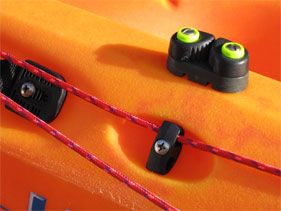
It's now necessary to fit a pair of clamcleats, these will lock the anchor trolley line into position when at anchor.
Position the CL 213 Starboard cleat so that it sits on top of the anchor trolley line just forward of the rear flush mount, this allows easy use when seated. Drill and rivet into position adding a little silicone sealant to the rivets to help create a watertight seal.
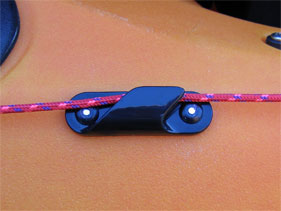
Note: the picture shows the line locked in clamcleat, not as described above for positioning.
Now position the CL 214 Port clamcleat forward of the control line cam cleat fitted earlier, this will allow easy access from a seated position. Sit the clamcleat on the anchor trolley line, mark, drill and rivet, again applying a little sealant to the rivets before fitting.

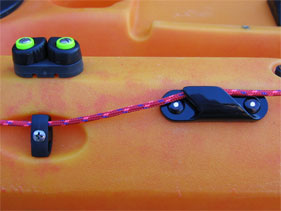
With the line below the clamcleats the trolley control line is free to move, it can be locked into any position by using both clamcleats at the same time. Using only one of the clamcleats may result in slippage.
Anchor line in rear position.
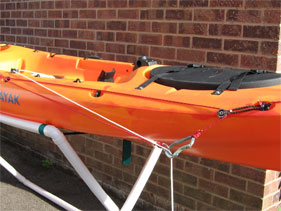
Anchor line in forward position.
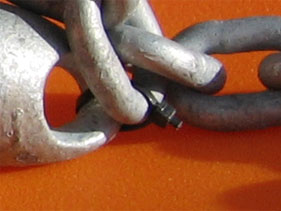
Now you will need your anchor. Attach one metre of 6 mm galvanised chain to the bottom of the anchor using a galvanised shackle. Lay the chain against the anchor and using the 10 cm cable tie, attach the chain to the top eye, the cable tie being your weak link. Attaching the anchor this way should prevent any losses, the weak link snapping if the anchor jams on retrieval, the anchor will then be pulled from the opposite end, pulling it backwards out of the snag.
Attach your B&Q cord to the free end of the chain, we used a bowline knot.
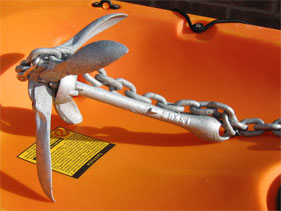
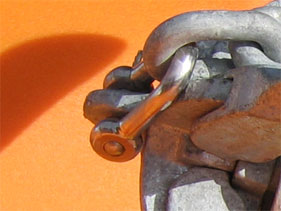
Galvanised shackle attaching chain to bottom of anchor, the screw fitting is worth checking regularly as they occasionally work loose.
Cable tie weak link.
Disclaimer:
Installing hardware may cause damage and/or void manufacturer warranties.
The information we provide is a free reference guide only. The author of this information, sponsors and the owners of the website that host this information are not liable for any problems or issues that arise from the use of this information. Users of this information hereby acknowledge that all use of this information is done by their own free will, at their own sole risk, understanding that injury or death could occur.