Fitting a Scotty Triple Rod Holder
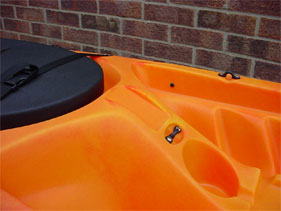
As Ocean Kayak had been kind enough to design a moulding for a Scotty holder on the Prowler 13, it would have been rude not to have used it. I've always liked the Scotty system, having fitted the original Scotty Triple Rod Holder system to the Caper Project.
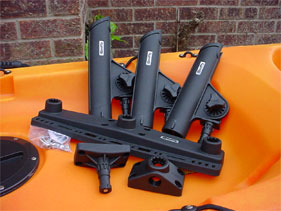
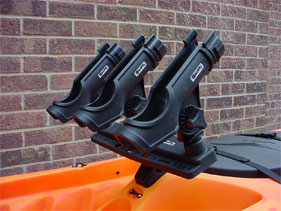
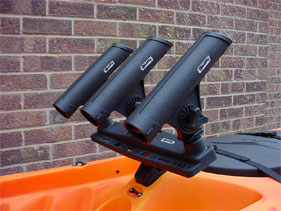
For 2005 the Triple has been completely redesigned, the new model being sleeker and made with less parts, it also incorporates a handy utility tray. The Triple comes complete with 3 rod holders, either Rodmaster II's or the popular Powerlock Rod Holders.

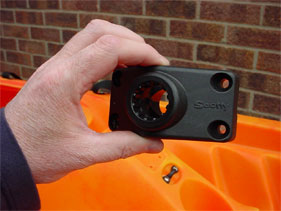
Fitting the Scotty system couldn't be easier. But before we drill any holes we need to decide which way round to place the deck mount. Viewing the deck mount from the top, you will see that there is a small plastic block, this locks the mounting post in position, thus preventing accidental release. This block needs to face forward towards the bow, the word Scotty which is engraved on the deck mount should now face the cockpit.
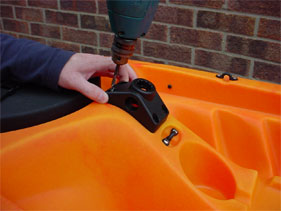
Holding the deck mount tightly in position, drill a 6 mm hole directly through one of the bolt holes.
If you are not comfortable with doing this, mark the first hole with a pencil and then drill the hole.

Place a M6 x 30 mm marine grade Pan Head Screw (these are not supplied) into the hole, you may need to use a screwdriver to ease the bolt into place. Checking that the deck mount has not moved, drill the next hole diagonally opposing the first. Insert the second bolt and screw home, drill and screw the final two holes in turn. Note that we haven't fitted any nuts to the deck mount bolts. Drilling and screwing in this way, stops the deck mount twisting and the possibility of misalignment.
Remove the bolts and deck mount from the kayak.

Using a sharp blade or glasspaper tidy up the burrs on both sides of the bolt holes.
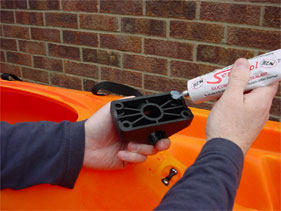
Add a generous bead of Clear Silicon Sealant Adhesive to each of the 4 holes on the base of the deck mount.
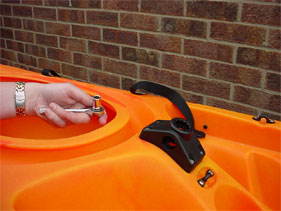
Checking that the deck mount is facing the correct way, place it back in position, push in the first bolt, then diagonally the second, third and fourth.
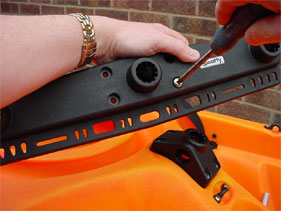
Remove the hatch and cover if you have not done so already, place a nut and washer onto each bolt in turn and make finger tight, with a 10 mm socket tighten each nut diagonally in turn, holding the bolts tight with a screwdriver. Wipe away any excess sealant immediately.
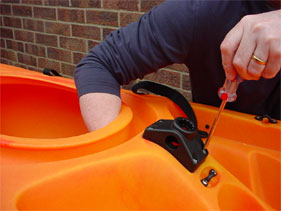
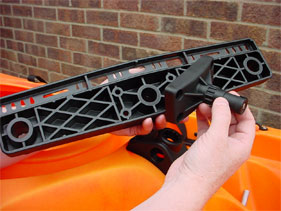
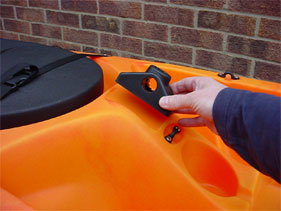
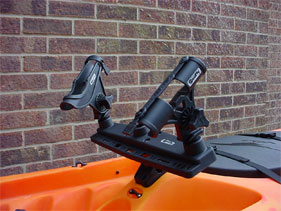
Next step is to add the Triple Mount board to the mounting post, the bolts and nuts for this are supplied as part of the kit. It is important to make sure that the cut out on the mounting post faces towards the cockpit when the bar is in position, the utility tray facing you when paddling, this ensures that it is locked correctly. Tighten each bolt in turn making sure that the nut has seated correctly in the base.
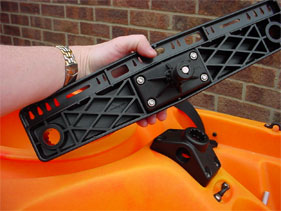
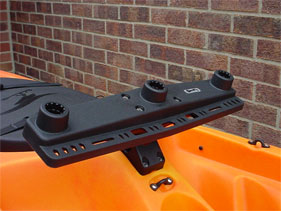
It's time to slot the mount board onto the deck mount, adding holders in whatever position and combination that you require.
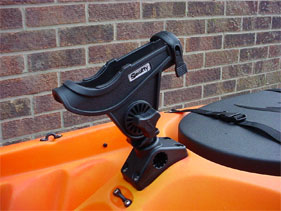
Or if your travelling light, just the one rod holder.

If you wish to mount a Scotty Rod Holder to your kayak, Scotty make a range of deck mounts to fit all applications, flush fits, round flush fits, raised deck mounts and rail mounts.

If launching and returning through surf, we recommend that you remove all rods plus the Triple Rod Holder, storing it safely and securely before entering the surf zone.
Disclaimer:
Installing hardware may cause damage and/or void manufacturer warranties.
The information we provide is a free reference guide only. The author of this information, sponsors and the owners of the website that host this information are not liable for any problems or issues that arise from the use of this information. Users of this information hereby acknowledge that all use of this information is done by their own free will, at their own sole risk, understanding that injury or death could occur.